I hate to water, but I like to grow things in containers. These two things don’t mix. It’s the same in my kitchen though. I hate to cook but I really like to eat good, healthy, delicious food. *Sigh* What’s a girl to do?
I’m always looking for ways to simplify or even automate some of the tasks in my life. Rather than spend 20-30 minutes watering my gardens and container gardens outside, how can I make it easier to do the watering? More importantly – how can I avoid watering at night and getting eaten alive by mosquitoes!!!!
Enter the solution to my problem – a container watering system. I’ve had this system in storage for a while – I was avoiding it because I thought it would be a challenge to put together. When the temperatures hit the 100 mark this summer and the mosquitoes were unbearable, I was determined to get this watering system going. I couldn’t keep up with the watering otherwise.
This content includes affiliate links. I get a small percentage of the sale for purchases made through links in this post AT NO EXTRA COST TO YOU. I use each product I review and only recommend those that I like and have worked well. Read my disclosure for more information.
Installation of the container watering system
I am embarrassed to say that I should have done this a long time ago. Putting the Nelson RainScapes Container Watering System together took maybe 20 minutes all together. I didn’t even fully read the instructions before I started. It was very simple.
Almost all of my container gardens are in a row (for ease of watering), so adding this system was a breeze. This watering system is technically meant for pots on a deck (you can attach the pieces and hose to the deck to better hide it), but I don’t mind the tubing showing just as long as the watering is done.
What you get in the RainScapes Watering System
There is one long tube which connects to your water spigot. It’s approximately 50 feet long. You can shorten in and attach a new cap at the end, if you so desire. I always leave my tubing at the longest length in case I decide to move it somewhere else. Here is a list of everything that comes in the box:
- 50 ft of 1/2″ tubing
- 3 mountable manifolds
- 50 ft of 1/4″ tubing
- 9 adjustable low-flow sprinkler heads
- 5 spikes to hold down the tubing
- 8 goof plugs (in case you make a hole that you didn’t intend to)
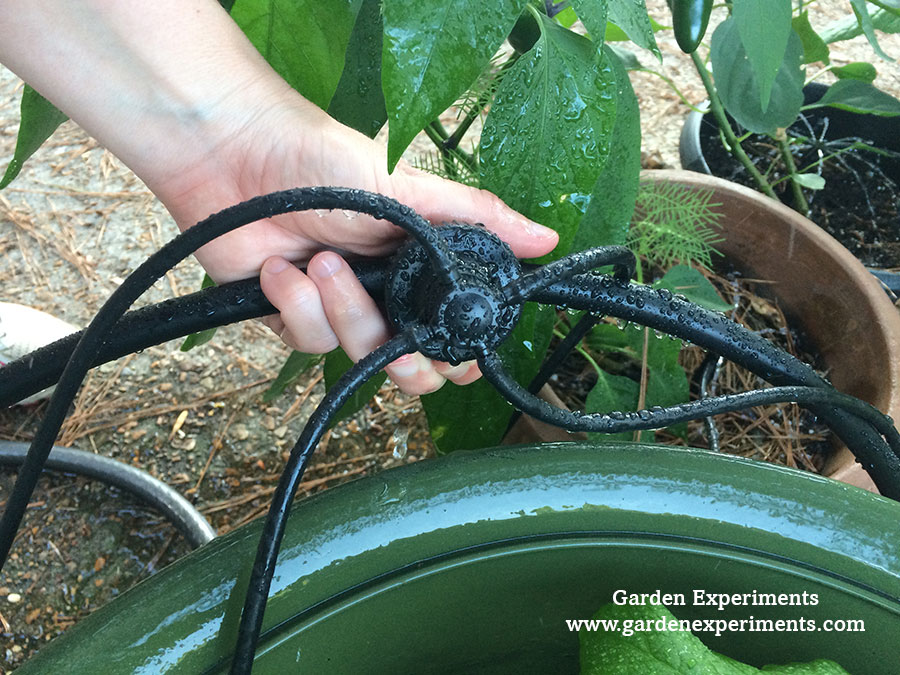
Here’s a photo of the manifold with attached 1/4″ tubing that extends to the containers.

How It Works
When you install this system, you cut the 1/4″ tubing to the length needed to reach from the manifold to the container. You can attach four to each manifold or just cap off the ones that you aren’t using.
I discovered that my manifold was leaking, so I had to tighten it a little bit, which improved the situation. If you are using this system on a wooden deck, you can attach the manifolds to the decking and tack the 1/2″ tubing to the wood to keep it out of the way. I’m using mine in the driveway, so I just hid it the best I could.
The adjustable sprinkler heads twist to increase or decrease the width of the sprayers, thus the amount of water that each container is getting. When I first turned the water on, a couple of my 1/4″ tubes popped off the manifold or sprinkler heads, but I just put them back on and it is working like a dream.
I know it seems like a simple thing, and really it is, but it has saved me a lot of time and freed me up to take on other tasks I tend to avoid 🙂
So, the secret is out — get a watering system for your container garden. It will save you so much time!
Looking for Container Garden Ideas?
You can grow ornamentals and vegetables in container gardens. You can grow container gardens in the shade and in the full sun.


